Các phòng mới nhất

Tên Phòng
Hiển thị các bài đăng có nhãn Thủ Thuật Blogger. Hiển thị tất cả bài đăng


Không phải ai cứ đam mê blogger là có thể viết ra dc và ngay từ lúc bắt đầu mình cũng đã nhưng vậy
cho đến bây giờ mình đã nắm vững dc một số thẻ,code và meta trong blogger
1 blogger mà k có nổi 1 thẻ nào thì không thể thành blogger  dc code cũng vậy
Meta là cái quan trọng nhất vì thiếu meta thì blogger của chúng ta không thể seo lên google dc
Lúc làm quen với blogger mình cứ nghĩ rằng nó giống hosting nhưng khi nhìn lại mấy cái code blogger và code hosting mình thấy khác nhau đôi chút
blogger gồm có thẻ
<?xml version="1.0" encoding="UTF-8" ?>
<!DOCTYPE html>
<b:skin> <![CDATA[ ]]>
<style> </style>
<b:section> </b:section>
đại loại như vậy đi vì mình không thể viết hết ra dc
nhưng khi xem bên hosting thì chúng ta hiểu ra rằng giữa 2 nền tảng thì code và incodeding sẽ khác nhau hoàn toàn
nếu có một ngày 2 nền tảng blogger và hosting cùng chung 1 code thì sẽ sao
sẽ gây ra xung đột đến cái khác và hiển thị không tốt
hosting khi viết bài chúng ta phải tạo 1 mục html khác và viết bài
còn blogger chúng ta không cần tạo 1 mục html nào cũng có thể viết dc sự khác nhau là như vậy đó
mấy bạn đi view blogger cứ nghĩ rằng mình coppy all về blogger sẽ nhận nhưng không dc chúng ta coppy all thì cũng phải edit lại từng đoạn 1 thôi chúng ta coppy all về hosting nó cũng không nhận
vì sao?
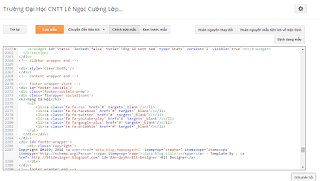
đây là đoạn chỉnh sửa HTML của chúng ta trên blogger
Khi chúng ta view trên blogger của họ thì chúng ta sẽ thấy khác đi hoàn toàn về code
<style type="text/css">
<!-- /*<link type='text/css' rel='stylesheet' href='https://www.blogger.com/static/v1/widgets/3337446685-css_bundle_v2.css' />
<link type='text/css' rel='stylesheet' href='//www.google.com/uds/css/gsearch.css' />
<link type='text/css' rel='stylesheet' href='https://www.blogger.com/dyn-css/authorization.css?targetBlogID=4360396539768832316&zx=3d0b7f7e-de39-4f05-ada6-2e7cb6505063' />
<style id='page-skin-1' type='text/css'><!--
/*
Theme Name : Minima Colored 3 Mag Style
Theme Published : 16 July 2014
Theme Updated : 19 December 2014
Theme Base Color : White and Blue
Theme Designer : Arlina Design
Designer URL : http://arlinadesign.blogspot.com
Theme License : This free Blogger template is licensed under the Creative Commons Attribution 3.0 License, which permits both personal and commercial use.
However, to satisfy the &#39;attribution&#39; clause of the license, you are required to keep the footer links intact which provides due credit to its authors. For more specific details about the license, you may visit the URL below:
http://creativecommons.org/licenses/by/3.0/
Many Thanks To :
- http://www.sweethemes.com
- http://www.dte.web.id
- http://blog.kangismet.net
- http://www.kompiajaib.com
- http://ngudang.blogspot.com
*/
khi chúng ta view nó sẽ không hiển thị như <b:skin nữa mà thay vào đó nó sẽ hiện thành <style id=page-skin
còn về hosting chúng ta coppy all của họ về hosting của chúng ta là chuyện bình thường chứ blogger chúng ta phải coppy từng đoạn code một mang về thay vào còn trả dc nữa là
các bạn công nhận chứ ^^!


Dạo này ngang qua mấy cái blogspot toàn gặp 404 trên HTTP có những blogspot vào k sao có cái thì phải thay thành https mới cho vào

dưới đây là bước mình hướng dẫn các bạn cách chuyển giao thức http sang https trong blogspot
 Bước 1 : Các bạn vào mẫu trong blogspot 
 Bước 2 : Các bạn vào chỉnh sửa HTML 
 Bước 3 : Các bạn tìm đến đoạn </body> Xong dán code bên dưới vào và lưu lại sau khi gắn code vào xong bạn sửa lại link trên menu trong thành https và lưu lại nhé 
<!--chuyensanghttps-->
<script type='text/javascript'>
function check_secure() {
var secssl = /^https/i;
var blog = document.location.hostname;
var slug = document.location.pathname;
var subs = window.location.search;
if (!window.location.origin.match(secssl)) {
window.location = &quot;https://&quot; + blog + slug + subs;
}
}
check_secure();
</script>
<!--endchuyensanghttps-->


Chắc hẳn những ai có Blogger thì chắc biết có 1 widget là thống kê cho blog hiển thị số lượt truy cập và mức độ biểu đồ tăng giảm. Dưới đây là hình ảnh minh hoạ
Bước 1: Các bạn đăng nhập vào Blog  ---> Bố cục
Bước 2: Chọn Thêm Tiện ích --->Thống kê blog ----> Chọn kiểu rồi bấm Lưu
Các bạn để ý vào link của Widget các bạn vừa tạo và nhớ cái ID sau cùng của dòng link. Thường thì mặc định của Widget này là Stats1 các bạn có thể xem hình dưới
Bước 3: Các bạn chọn Mẫu => Chỉnh sửa HTML => Chọn đến tiện ích lúc nãy các bạn vừa thêm, như của mình là Stats1 
Sau đó các bạn sẽ thấy 1 đoạn code
1234567891011121314151617<b:widget id='Stats1' locked='false' title='Tổng số lượt xem trang' type='Stats' visible='true'>
<b:includable id='main'>
<b:if cond='data:title != &quot;&quot;'><h2><data:title/></h2></b:if>
<div class='widget-content'>
<!-- Content is going to be visible when data will be fetched from server. -->
<div expr:id='data:widget.instanceId + &quot;_content&quot;' style='display: none;'>
<!-- Counter and image will be injected later via AJAX call. -->
<b:if cond='data:showSparkline'>
<img alt='Sparkline' expr:id='data:widget.instanceId + &quot;_sparkline&quot;' height='30' width='75'/>
</b:if>
<span expr:class='&quot;counter-wrapper &quot; + (data:showGraphicalCounter ? &quot;graph-counter-wrapper&quot; : &quot;text-counter-wrapper&quot;)' expr:id='data:widget.instanceId + &quot;_totalCount&quot;'>
</span>
<b:include name='quickedit'/>
</div>
</div>
</b:includable>
</b:widget>
Các bạn đổi code trên thành
123456789101112131415161718192021222324252627282930313233343536<b:widget id='Stats1' locked='false' title='Thống kê Blogspot' type='Stats' version='1' visible='true'>
    <b:includable id='main'>
  <b:if cond='data:title'><h2 class='iconthongke'><data:title/></h2></b:if>
  <div class='widget-content'>
    <!-- Content is going to be visible when data will be fetched from server. -->
    <div expr:id='data:widget.instanceId + &quot;_content&quot;' style='display: none;'>
      <!-- Counter and image will be injected later via AJAX call. -->
      <b:if cond='data:showSparkline'>
        <img alt='Sparkline' expr:id='data:widget.instanceId + &quot;_sparkline&quot;' height='30' src='http://2.bp.blogspot.com/-nsxCtkYnchQ/VLEifAyf97I/AAAAAAAAIlk/9Viyy0W9r04/s1600/FFF.png' title='Sparkline' width='75'/>
      </b:if>
      <b:if cond='data:showGraphicalCounter'>
        <span class='counter-wrapper graph-counter-wrapper' expr:id='data:widget.instanceId + &quot;_totalCount&quot;'/>
      <b:else/>
        <span class='counter-wrapper text-counter-wrapper' expr:id='data:widget.instanceId + &quot;_totalCount&quot;'/>
      </b:if>
<script type='text/javascript'>
function postCount(json){
document.write(&quot;<span class='counts post2'> Tổng số bài viết &quot;);
var count = json.feed.openSearch$totalResults.$t;
document.write(&quot;<span class='count'>&quot; + count + &quot;</span>&quot;);
document.write(&quot;</span>&quot;)
}
function numberOfComments(json){
document.write(&quot;<span class='counts comment'> Tổng lượt Comments &quot;);
var count = json.feed.openSearch$totalResults.$t;
document.write(&quot;<span class='count'>&quot; + count + &quot;</span>&quot;);
document.write(&quot;</span>&quot;)
}
</script>
<script src='/feeds/posts/default?alt=json-in-script&amp;amp;max-results=0&amp;amp;callback=postCount' type='text/javascript'/>
<script src='/feeds/comments/default?alt=json-in-script&amp;amp;max-results=0&amp;amp;callback=numberOfComments'/>

    </div>
  </div>
</b:includable>
  </b:widget>
Bước 4: Tìm thẻ  </head> và sau đó chèn đoạn code này trên thẻ vừa tìm được.
12345678910111213141516171819<link href='//fonts.googleapis.com/css?family=PT+Sans:400,700' rel='stylesheet' type='text/css'/>
<link href='//maxcdn.bootstrapcdn.com/font-awesome/4.5.0/css/font-awesome.min.css' rel='stylesheet'/>
<style type='text/css'>
/* Blogger Custom Stats widget by Thinh ND */
.Stats img {display:none!important;background-image:none;}
.Stats .counter-wrapper {width:92%;text-align:right;margin:10px;line-height:35px;color:#333;font-weight:700;font-size:16px;margin-left: 0;}
.Stats .counter-wrapper:after {content:&quot;Page Views&quot;;float:left;text-align:left;font-size:13px;font-weight:700;color:#333;}
.counts {display:inline-block;width:92%;font-size:13px;line-height:35px;color:#333;font-weight:700;}
.counts .count {display:inline-block;font-size:16px;height:30px;
vertical-align:top;direction:ltr;float:right;color:#333;font-weight:700!important;}
.counts:hover .titles:before {color:#333!important;border-radius:2px;border-color:rgba(255,255,255,0.1);}
.counter-wrapper.text-counter-wrapper:before, .counts:before {display:inline-block;font-size:13px;font-family:FontAwesome;font-style:normal;font-weight:normal;margin:0 10px 0 10px;float:left;width:10px;text-align:center;}
.counter-wrapper.text-counter-wrapper:before, .counts:before {
display:block;background-color:#fff;color:#333;width:35px;height:35px;font-size:18px;line-height:35px;border-radius:2px;margin:0px 8px 0 0;}
.counter-wrapper.text-counter-wrapper:before {content:&quot;\f06e&quot;;}
.counts.post2:before {content:&quot;\f044&quot;;}
.counts.comment:before {content:&quot;\f0e6&quot;;}
#Stats1_content {width:auto;height:auto;background-color:#fff;}
</style>
Bước 5: Cuối cùng Lưu Mẫu và xem kết quả.


Xin chào các bạn. Hôm nay mình muốn giới thiệu tới các bạn thủ thuật làm thế nào để tạo hiệu ứng Lazy Load cho blogspot. Nếu blogspot của bạn quá "cồng kềnh" với trang chủ hay trong mỗi bài viết thì thủ thuật này sẽ cứu được blog của bạn trong mắt khách hàng và các công cụ tìm kiếm đấy. Ngay bây giờ hãy cùng Star Tuấn Blog tạo hiệu ứng Lazy Load cho blog của bạn nhé. Cũng khá đơn giản thôi !
Hãy vào Blogger.com → Blog của bạn → Teamplate → Edit HTML rồi copy và dán đoạn code bên dưới của mình vào trước thẻ

<script type='text/javascript'>
//<![CDATA[
// Lazy Load
(function(a){a.fn.lazyload=function(b){var c={threshold:0,failurelimit:0,event:"scroll",effect:"show",container:window};if(b){a.extend(c,b)}var d=this;if("scroll"==c.event){a(c.container).bind("scroll",function(b){var e=0;d.each(function(){if(a.abovethetop(this,c)||a.leftofbegin(this,c)){}else if(!a.belowthefold(this,c)&&!a.rightoffold(this,c)){a(this).trigger("appear")}else{if(e++>c.failurelimit){return false}}});var f=a.grep(d,function(a){return!a.loaded});d=a(f)})}this.each(function(){var b=this;if(undefined==a(b).attr("original")){a(b).attr("original",a(b).attr("src"))}if("scroll"!=c.event||undefined==a(b).attr("src")||c.placeholder==a(b).attr("src")||a.abovethetop(b,c)||a.leftofbegin(b,c)||a.belowthefold(b,c)||a.rightoffold(b,c)){if(c.placeholder){a(b).attr("src",c.placeholder)}else{a(b).removeAttr("src")}b.loaded=false}else{b.loaded=true}a(b).one("appear",function(){if(!this.loaded){a("<img />").bind("load",function(){a(b).hide().attr("src",a(b).attr("original"))[c.effect](c.effectspeed);b.loaded=true}).attr("src",a(b).attr("original"))}});if("scroll"!=c.event){a(b).bind(c.event,function(c){if(!b.loaded){a(b).trigger("appear")}})}});a(c.container).trigger(c.event);return this};a.belowthefold=function(b,c){if(c.container===undefined||c.container===window){var d=a(window).height()+a(window).scrollTop()}else{var d=a(c.container).offset().top+a(c.container).height()}return d<=a(b).offset().top-c.threshold};a.rightoffold=function(b,c){if(c.container===undefined||c.container===window){var d=a(window).width()+a(window).scrollLeft()}else{var d=a(c.container).offset().left+a(c.container).width()}return d<=a(b).offset().left-c.threshold};a.abovethetop=function(b,c){if(c.container===undefined||c.container===window){var d=a(window).scrollTop()}else{var d=a(c.container).offset().top}return d>=a(b).offset().top+c.threshold+a(b).height()};a.leftofbegin=function(b,c){if(c.container===undefined||c.container===window){var d=a(window).scrollLeft()}else{var d=a(c.container).offset().left}return d>=a(b).offset().left+c.threshold+a(b).width()};a.extend(a.expr[":"],{"below-the-fold":"$.belowthefold(a, {threshold : 0, container: window})","above-the-fold":"!$.belowthefold(a, {threshold : 0, container: window})","right-of-fold":"$.rightoffold(a, {threshold : 0, container: window})","left-of-fold":"!$.rightoffold(a, {threshold : 0, container: window})"})})(jQuery);$(function(){$("img").lazyload({placeholder:"https://blogger.googleusercontent.com/img/b/R29vZ2xl/AVvXsEivEu9zQxYJQUhdtNtzZ51Rloey-YSan9s56J2A9hl5l8-ZiBTuyGLO4QlIfL1fdmgJ_u3W7gT11fB5OP36NuN8pGsPTYspgedp4jF990a6cJSqjns9PTK2o8n1IeA6koNGG8k9O0x21C13/s640/arlinadesign.gif",effect:"fadeIn",threshold:"-50"})});
//]]>
</script>
Hai  Bước cuối cùng là lưu lại và tận hưởng thành quả của bạn vừa làm.


Thủ thuật này giúp tạo ra sự khác biệt cho blog của bạn. Theo đó tiện ích được chọn hiển thị sẽ mặc định được ẩn đi, và widget đó chỉ hiện thị khi nào vào xem các bài viết thuộc nhãn đã được bạn chỉ định. Tiện ích này tương tự như thủ thuật: Hiện thị widget ở những trang nhất định trong blogspot
document, widget icon

» Bước 1: Xác định ID của Wdget tiện ích cần tùy biến theo thủ thuật này.

1.1- Vào Bố cục (Layout) -> Nhấp vào Chỉnh sửa (Edit) trên Widget cần xử lý
Chỉnh sửa tiện ích trong tiện ích HTML
1.2 - Một cửa sổ Popup bật lên, bạn nhìn vào phía trên góc phải (gần thanh tiêu đề) sẽ thấy dòng có dạng tương tự sau: …null&widgetId=HTML17 (trong trường hợp này là widget HTML17, đối với widget khác sẽ có ID khác)
Xác định ID của tiện ích trong blogspot

» Bước 2: Cài đặt hiện thị widget khi xem bài viết thuộc một nhãn nhất định.

- Bài viết này mình sẽ hướng dẫn cho các bạn 2 cách thực hiện khác nhau bạn có thể tùy ý thực hiện và chọn lấy một cách.

CÁCH 1: KẾT HỢP CSS VÀ XML
1.1. Đăng nhập Blogger.
1.2. vào mẫu (Template) => Chỉnh sửa HTML (Edit HTML) => Đặt đoạn code sau đây vào trước thẻ </head>:
<style type='text/css'>
/*Hiển thị widget khi xem các bài viết của một label (nhãn) nhất định */
#ID_widget {display:none;}
</style>
- Trong đó: ID_widget // Thay ID widget muốn hiển thị vào đây. (Ở ví dụ trên thì ID_widget là HTML17). Khi đó thay vào sẽ được như sau:
<style type='text/css'>
#HTML17 {display:none;}
</style>
Bước 3: tìm đoạn code tương tự đoạn code sau đây:
<data:label.name/></a><b:if cond='data:label.isLast != &quot;true&quot;'>,</b:if>
- Thêm vào sau nó đoạn code sau:
<!-- Hiển thị widget khi xem các bài viết của một nhãn nhất định http://namkna.blogspot.com/-->
<b:if cond='data:blog.pageType == "item"'>
<b:if cond='data:label.name == "Nhãn"'>
<style type='text/css'>
#HTML17 {display:block;}
</style>
</b:if>
</b:if>

Nhãn: Thay nhãn của bài viết muốn hiển thị widget.
ID_widget: Thay ID widget muốn hiển thị vào đây.
Bước 4: Save template. (Lưu mẫu)
Cách khác: theo thuthuatblogger, thì  ở bước 3 bạn tìm đoạn code tương tự như sau:
<span class='post-labels'>
<b:if cond='data:post.labels'>
<data:postLabelsLabel/>
<b:loop values='data:post.labels' var='label'>
<a expr:href='data:label.url' rel='tag'><data:label.name/></a><b:if cond='data:label.isLast != &quot;true&quot;'>,</b:if>
</b:loop>
</b:if>
</span>
Rồi đổi nó thành thế này:
<span class='post-labels'>
<b:if cond='data:post.labels'>
<data:postLabelsLabel/>
<b:loop values='data:post.labels' var='label'>
<script>var getLabel=&#39;<data:label.name/>&#39;;</script>
<a expr:href='data:label.url' rel='tag'><data:label.name/></a><b:if cond='data:label.isLast != &quot;true&quot;'>,</b:if>
</b:loop>
</b:if>
</span>
Kế đến dùng từ khóa HTML17 tìm đến cấu trúc XML của tiện ích này rồi thêm vào thành như sau (phần được đánh dấu màu đỏ là phần thêm vào):
<b:widget id='HTML1' locked='false' title='Tên tiện ích' type='HTML'>
<b:includable id='main'>
<b:if cond='data:blog.pageType == &quot;item&quot;'>
<script>
//<![CDATA[
// Code to display widgets on posts from a label by www.thuthuatblogger.info
if(getLabel=="
Tên nhãn") {
document.getElementById("HTML17").style.display = "block";
}
//]]>
</script>
</b:if>
<!-- only display title if it's non-empty -->
<b:if cond='data:title != &quot;&quot;'>
<h2 class='title'><data:title/></h2>
</b:if>
<div class='widget-content'>
<data:content/>
</div>
</b:includable>
</b:widget>
Thay Tên nhãn thành tên của nhãn mà bạn muốn áp dụng thủ thuật. Lưu Template là hoàn thành.
Mở rộng: nếu bài viết có nhiều nhãn thì có thể thêm điều kiện để tiện ích chỉ hiển thị đối với nhãn cuối cùng hay không. Câu trả lời của mình là chỉ cần sử dụng Bước 1 với code nhãn như sau:
<span class='post-labels'>
<b:if cond='data:post.labels'>
<data:postLabelsLabel/>
<b:loop values='data:post.labels' var='label'>
<a expr:href='data:label.url' rel='tag'><data:label.name/></a><b:if cond='data:label.isLast != &quot;true&quot;'>,</b:if>
<b:if cond='data:blog.pageType == &quot;item&quot;'>
<b:if cond='data:label.isLast == &quot;true&quot;'>

<style type='text/css'>
#HTML17 {display:block}
</style>
</b:if>
</b:if>

</b:loop>
</b:if>
</span>
Chúc thành công!
Nguồn bài viết từ terocket.com


security icon

1. Cài đặt password cho tất cả bài viết trong blog.
- vào bố cục
- vào chỉnh sửa code HTML
- thêm đoạn code bên dưới vào sau thẻ <head> hoặc trước thẻ </head>
<b:if cond='data:blog.pageType == "item"'>
<script language='JavaScript'>
var password;
var pass1="blogspotvn";

password=prompt('Please enter your password to view this page!',' ');

if (password==pass1)
alert('Password Correct! Click OK to enter!');
else
{
window.location="http://www.blogspotvn.blogspot.com";
}
</script>
</b:if>

- Có thể thay đổi code màu xanh theo ý thích của bạn.
- var pass1="blogspotvn"; : thiết lập password (đổi code màu đỏ lại)
- window.location="http://www.blogspotvn.blogspot.com"; : đây là code thiết lập trang web sẽ tự động trả lại trở về khi bạn đánh sai password.(đổi code màu đỏ lại)

2. Thiết lập cho 1 bài viết cụ thể nào đó:
- Chỉ cần đổi lại code trên thành code bên dưới là được

<b:if cond='data:blog.url == "Địa chỉ URL của bài viết"'>
<script language='JavaScript'>
var password;
var pass1="blogspotvn";

password=prompt('Please enter your password to view this page!',' ');

if (password==pass1)
alert('Password Correct! Click OK to enter!');
else
{
window.location="http://www.blogspotvn.blogspot.com";
}
</script>
</b:if>


☼ Mở rộng của thủ thuật :
- Với thủ thuật này ta có thể thiết lập nhiều password khác nhau, chỉ cần điền đúng 1 trong những password đó là có thể xem được bài viết đó.
- Và đây là code :


<b:if cond='data:blog.pageType == "item"'>
<script language='JavaScript'>
var password;
var pass1="password1";
var pass2="password2";
var pass3="password3";

password=prompt('Please enter your password to view this page!',' ');

if (password==pass1 || password==pass2 || password==pass3)
alert('Password Correct! Click OK to enter!');
else
{
window.location="http://www.blogspotvn.blogspot.com";
}
</script>
</b:if>